HOW TO TARP A ROOF
- Whitaker Roofing Company
- 06 Mar, 2026
How to Tarp a Roof: A Simple Emergency Guide for Homeowners
“If the roof is unsafe, high, steep, wet, or icy, stop immediately and call a professional.“
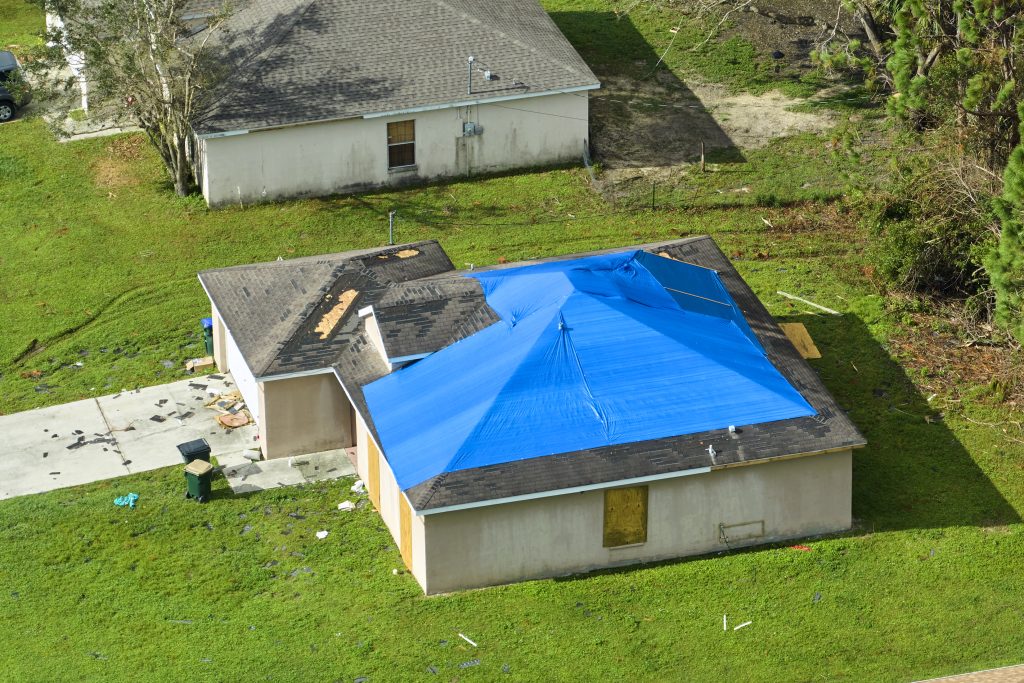
A sudden storm rips off a few shingles, or you spot a growing leak after high winds — either way, you need to stop more water from getting inside right now, before the interior damage gets worse.
Tarp the roof properly and you can buy days or even weeks until a professional crew arrives. Do it wrong and the tarp can actually cause more harm than good (or blow off in the next gust).
Here’s a straightforward, step-by-step method that works in most situations. This is temporary emergency protection — not a permanent fix.
Before You Start: Safety First
- Never get on a wet, icy, or steeply pitched roof.
- Never work alone — have someone on the ground to steady the ladder.
- If the roof is high, very steep, or you’re not comfortable with heights, stop and call a professional immediately.
- Use a sturdy extension ladder rated for your weight + tools. Secure it at the top and bottom.
- Wear non-slip shoes with good tread. Gloves and eye protection are smart.
If any of this feels unsafe, skip the DIY and call us — we do emergency tarping.

What You’ll Need (most of this is at big-box stores)
- Heavy-duty tarp or roof tarp (at least 10–12 mil thick, UV-treated, grommeted every 2–3 ft)
- 2×4 lumber (enough to run along the edges and peak)
- Roofing nails (1¼″–1½″) or wood screws + washers
- Hammer or cordless drill
- Ladder(s)
- Utility knife or heavy scissors
- Duct tape or roof-seal tape (for seams)
- Sandbags, bricks, or concrete blocks (for weighting edges if needed)
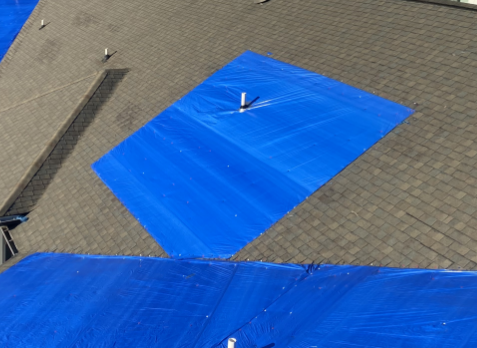
Step-by-Step: How to Tarp a Roof Safely
- Assess & Clear the Area
Identify the damaged zone (missing shingles, blown-off section, large tear).
Clear leaves, branches, and loose debris from that area so the tarp lies flat. - Cover the Damaged Area + Buffer Zone
The tarp should extend at least 3–4 feet beyond the damaged section in every direction.
Example: if 6 shingles blew off near the eave, cover 10–12 ft wide and run the tarp up past the ridge if possible. - Start at the Bottom (Work Upward)
Lay the tarp so it overlaps the intact shingles below the damage (like shingles themselves).
Water must always run over the tarp, never under it. - Secure the Bottom Edge First
Place a 2×4 along the lower edge of the tarp (on top of the tarp).
Nail or screw through the 2×4 → tarp → shingles → decking every 12–16 inches.
Use washers under screw heads if possible — it spreads the load and prevents tearing. - Pull Taut & Secure Sides
Pull the tarp tight (no wrinkles or sagging pockets).
Repeat the 2×4 method along both side edges, nailing/screwing every 12–16 inches.
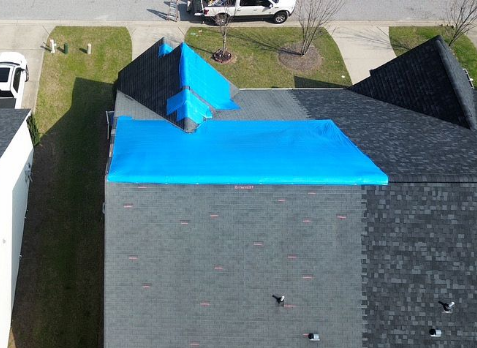
Angle nails/screws slightly downward so water runs off. - Seal the Top Edge (Critical Step)
Run a 2×4 along the upper edge of the tarp.
Nail/screw it securely into the roof deck.
Apply roofing cement or butyl tape along the top edge where tarp meets shingles — this stops wind-driven rain from blowing underneath. - Add Extra Anchoring if Windy
- Weight the bottom edge with sandbags or concrete blocks.
- Run additional 2×4s across the middle of large tarps.
- Use extra screws/washers in high-wind areas.
- Check Drainage
- Make sure the tarp slopes so water runs off the roof and into gutters (or away from the house).
- Fix any low spots that could pond water — add temporary framing if needed.

When to Stop DIY and Call Us
- Roof is steep (>6/12 pitch) or higher than one story
- You see significant decking rot or large areas of missing shingles
- Active heavy rain or high winds are forecast within 24 hours
- You’re uncomfortable on a ladder or roof
- The leak is already inside the house and spreading
Important Safety Note
Never put yourself in danger to apply a tarp. Falls are the leading cause of roofing injuries. If the roof is unsafe, high, steep, wet, or icy, stop immediately and call a professional. We offer emergency tarping and inspection services — free roof inspection included. We’ll get there fast, secure the roof properly, and prevent further interior damage until permanent repairs can be scheduled. Call or text 678-252-6110 or visit https://wrcroofing.com to schedule.
Recent Blog
ROOF AND GUTTER MAINTENANCE Whitaker Roofing Company 20 MARCH, 2026 Roof and Gutter Maintenance: The Simple Seasonal Routine That Saves Thousands “Roof and gutter maintenance…
DOES HOMEOWNERS INSURANCE COVER ROOF LEAKS? Whitaker Roofing Company 13 March, 2026 Does homeowners insurance cover roof leaks? “Homeowners insurance can pay for roof leaks…
HOW TO TARP A ROOF Whitaker Roofing Company 06 Mar, 2026 How to Tarp a Roof: A Simple Emergency Guide for Homeowners “If the roof…
Get Your FREE Roof Inspection!
Interested in safeguarding your home with a no-cost roof inspection and assessment?